Purchase Orders: Managing Your Orders
Back to Inventory ManagementWhat you’ll need
- Permissions: Manage inventory & View suppliers
- Prerequisite: At least one supplier created (see Welcome Suppliers: Adding New Vendors)
1. Start a new purchase
- From the sidebar, click Inventory ➔ Purchase Orders.
- Click New Purchase.
- The New Purchase form appears.
2. Select your supplier & destination
- Supplier – choose from vendors you’ve added.
- Received at – defaults to your “Default delivery” store (see Store Details: Updating Store Info).
- Purchase order date – today’s date by default; change if needed.
- Expected on – (Optional) the date you expect to receive the order
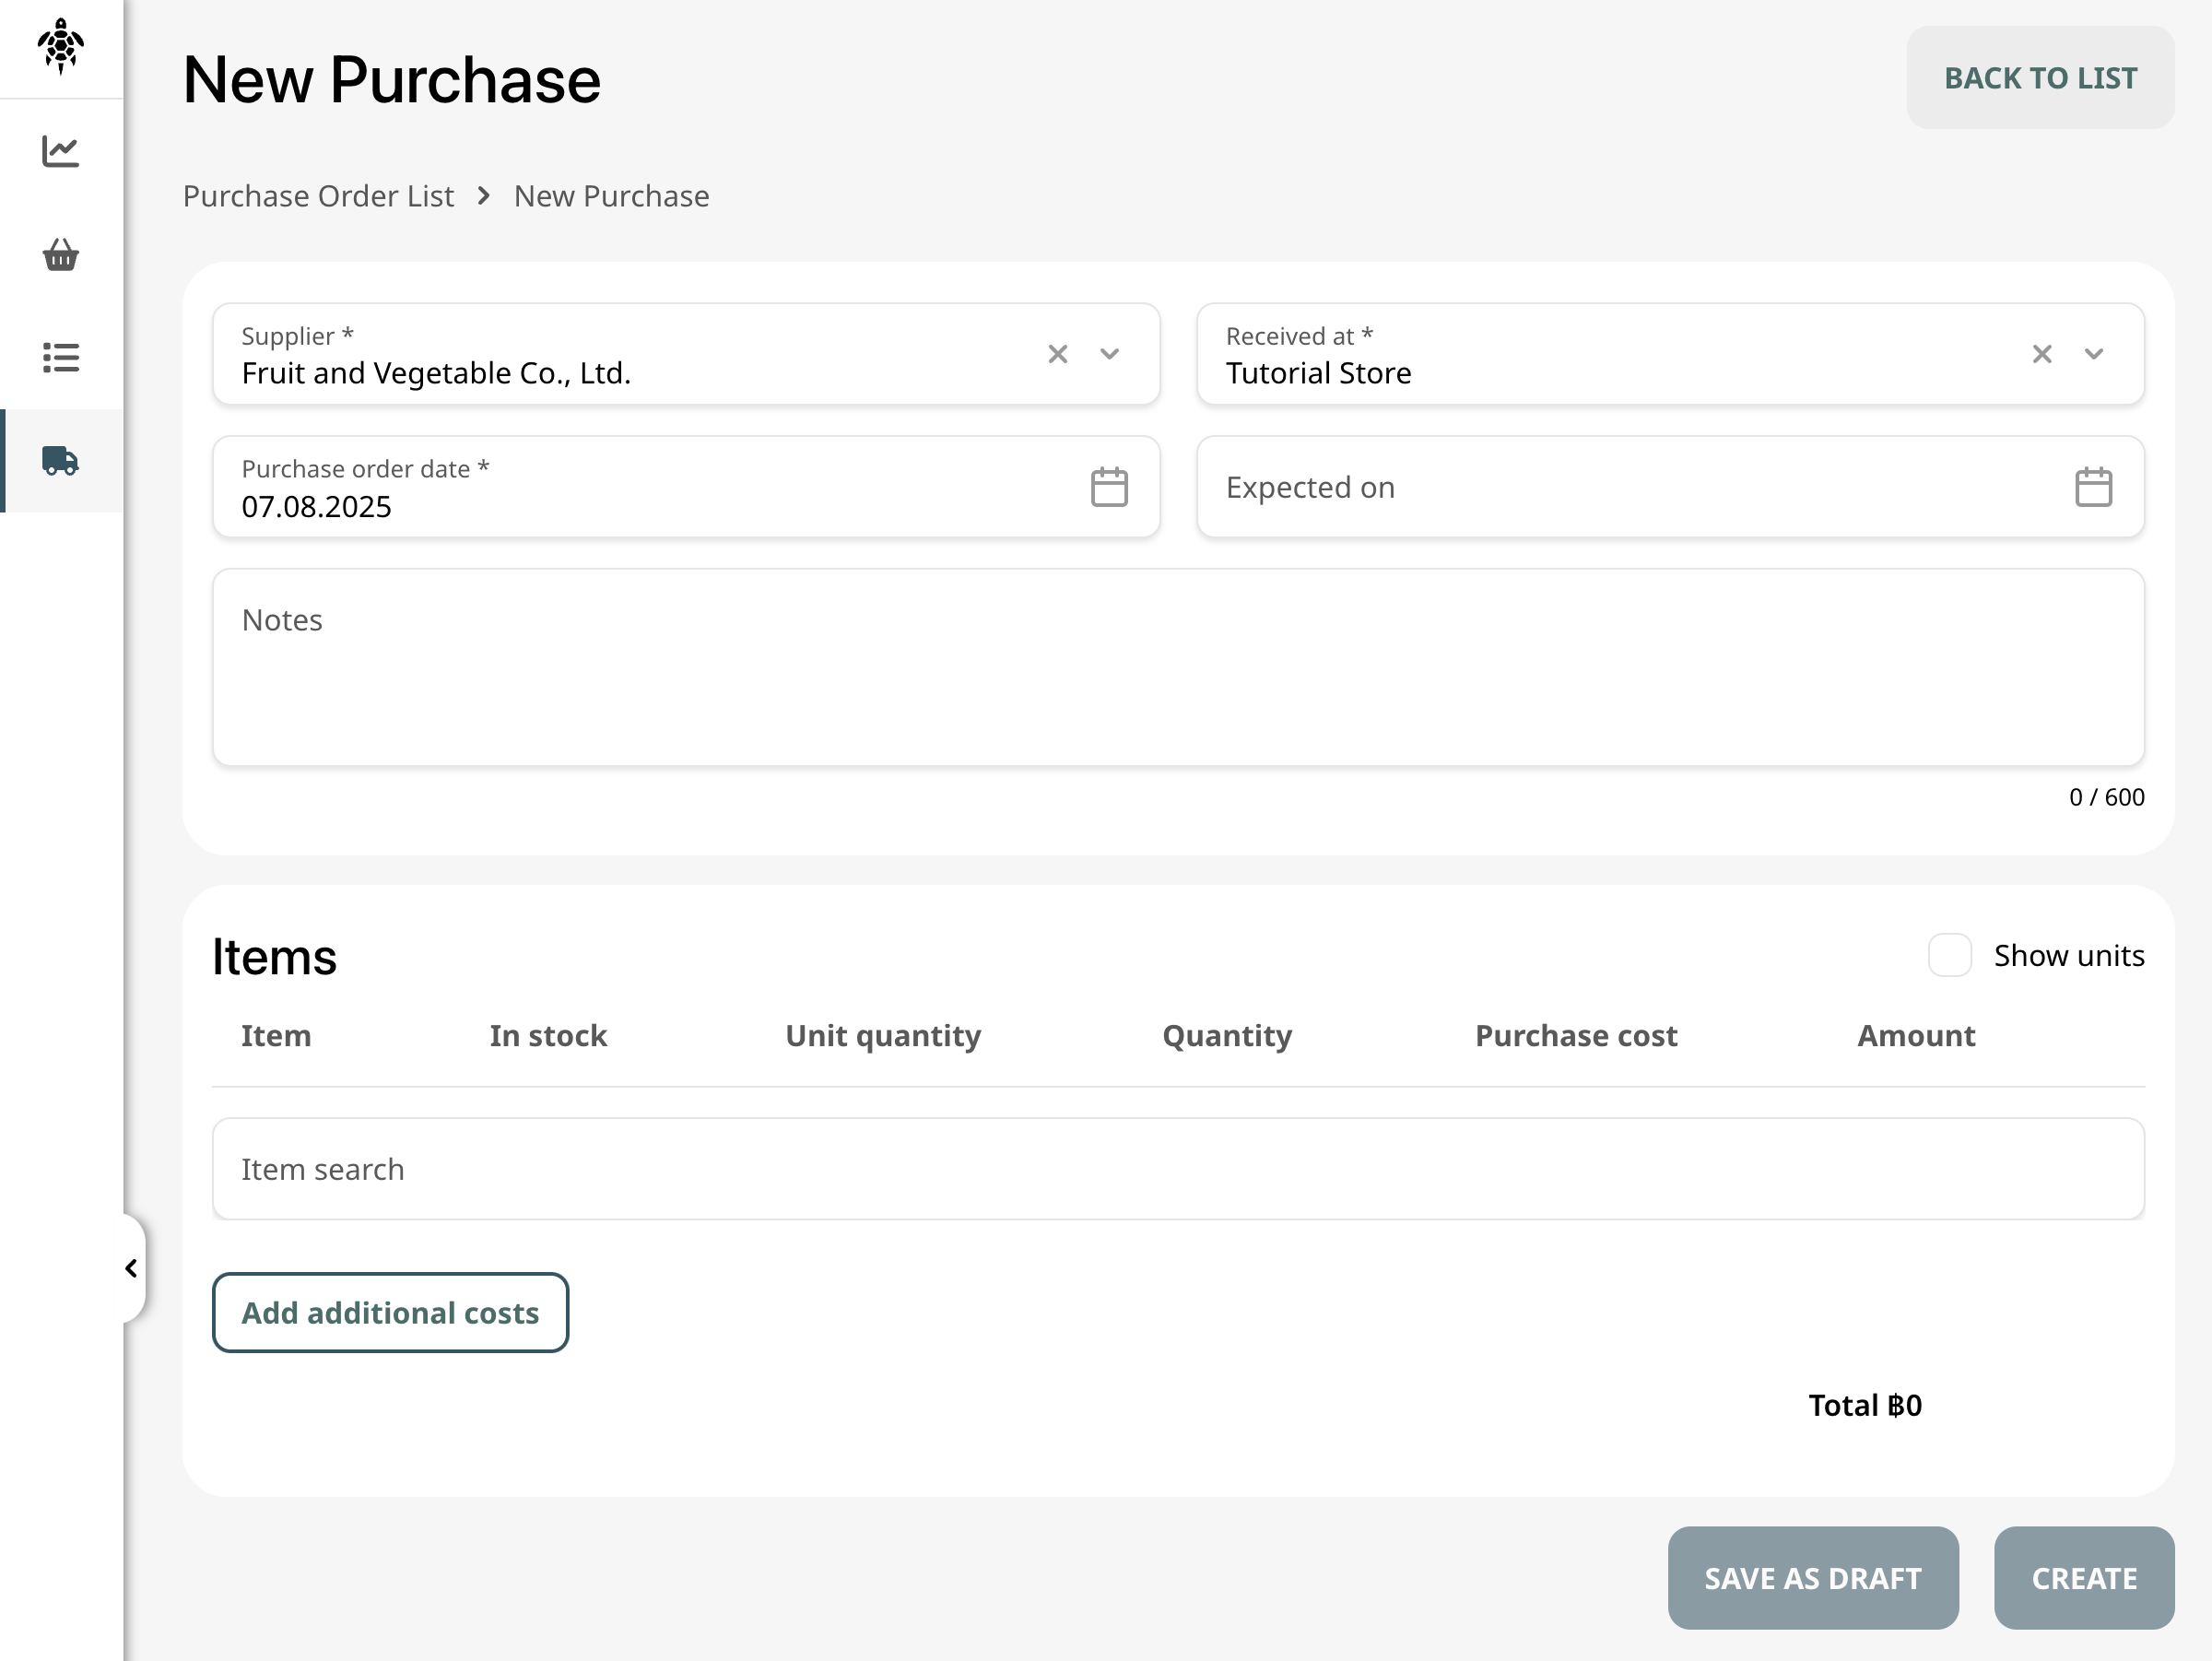
3. Add items to your order
- Click the Item search field and select each product to order.
- Enter Quantity and verify Unit quantity if you’re ordering by weight/volume.
- Adjust Purchase cost if needed (defaults to your item’s average cost).
- Repeat for every item in the order.
4. (Optional) Add extra costs
- Click Add additional costs to include shipping, handling, or taxes.
- These extras roll into the Total at the bottom.
5. Save or send
- Save as Draft – keep the order incomplete to finish later.
- Create – finalizes the purchase order.
7. Receiving your stock
- In the Purchase Order click RECEIVED.
- Confirm each line’s received quantity.
- Save to push items into inventory.
What’s next?
- 🔗 Welcome Suppliers: Adding New Vendors
- 🔗 Moving Stock: Transfer Orders Explained
- 🔗 Fine-Tune Stock: Adjustments & Corrections
- 🔗 Count On It: Doing an Inventory Count
- 🔗 Daily Snapshot: Register Daily Sales
- 🔗 From Raw to Ready: Production Workflows
- 🔗 Track the Story: Viewing Inventory History
- 🔗 Worth Its Weight: Understanding Stock Valuation
🎉 With your purchase orders created and stock received, your inventory will stay perfectly in sync—happy ordering!